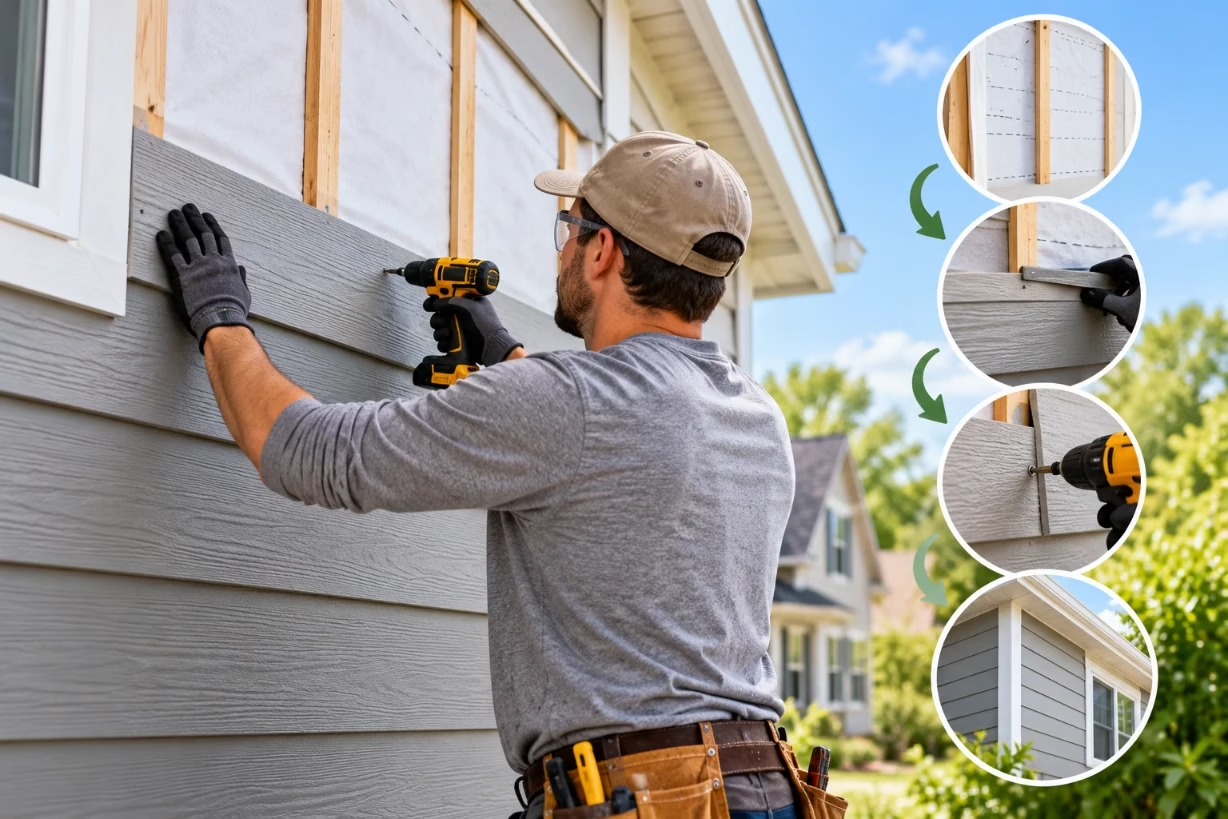
Siding with fiber cement follows clear steps: plan the layout, install flashing and house wrap, add trim, hang the fiber cement planks or panels, then caulk, paint, and inspect. When you respect each step and the manufacturer rules, this siding holds up for decades with low upkeep.
Siding With Fiber Cement: Why The Steps Matter So Much
When people talk about siding with fiber cement, they often jump straight to how tough it is or how long it lasts. I agree, the durability is a big deal. But in my experience, what really decides whether this material becomes a blessing or a headache is the installation process itself. If you follow the right steps, fiber cement looks sharp, sheds water the way it should, and needs very little attention for years. If you rush or skip things, small mistakes slowly turn into leaks, cracks, and swelling boards.
In this guide, I walk through the full siding with fiber cement installation steps, in the same order I would explain them to a careful homeowner or a new crew member. I keep the language plain, and I focus on the parts that usually cause trouble on real jobs, not just in manuals. By the time you reach the end, you should feel much more confident about what to expect, what to demand from a contractor, or how to tackle the work yourself if you are handy and patient.
What Fiber Cement Siding Actually Is And Why It Works
Before getting into the step by step process of siding with fiber cement, I want to explain what you are actually putting on your walls. Fiber cement siding is a mix of cement, sand, and cellulose fibers. Once cured and formed into planks or panels, it becomes a strong, dense board that resists fire, insects, and rot in a way that ordinary wood siding simply cannot match.
Most homeowners pick fiber cement because they want the look of wood grain without worrying about termites, carpenter ants, or constant scraping and repainting. It also holds paint very well, especially when you use a good quality exterior paint and follow the right priming and caulking steps. That is why siding with fiber cement has become such a common choice on new builds and major remodels all over the United States.
Planning Stage: Getting Ready For Siding With Fiber Cement
I always tell people that a clean plan is the first real step in siding with fiber cement. Once you start cutting boards and nailing them up, it is hard to change your mind about layout, trim width, or joint placement. Careful planning saves money, time, and frustration.
Measure The Walls And Openings
Start by measuring each wall from corner to corner and from the bottom of the sheathing to the top where the siding will stop. Write measurements down, wall by wall, instead of trying to keep everything in your head. Measure around windows, doors, and any vents so you can plan trim and flashing. Good siding with fiber cement work depends on knowing exactly how many planks or panels you need and where the cuts will land.
Check Local Codes And Manufacturer Rules
Fiber cement manufacturers give clear instructions about clearances above roof lines, decks, and soil. They also explain how far joints must be from corners and fastener spacing. When you are siding with fiber cement, following these rules is not “extra”; it is what keeps your warranty valid and your home protected.
Gather The Right Tools And Safety Gear
Fiber cement is tougher than wood, and it makes a fine dust when cut. That means you need specific tools and safety steps. Here are the basics I always use on any siding with fiber cement project:
- Safety glasses, hearing protection, and a proper dust mask or respirator
- Circular saw with fiber cement rated blade or a dedicated shears tool
- Measuring tape, chalk line, level, and framing square
- Coil or stick siding nailer (rated for fiber cement) or corrosion resistant screws
- Caulk gun and high quality exterior sealant, paint brushes and rollers
Skipping safety when siding with fiber cement is a mistake. The material is safe on your house, but cutting it without dust control and a mask is rough on your lungs and eyes.
Surface Prep: The Hidden Foundation Of A Good Job
The most beautiful fiber cement siding can fail if the surface behind it is not right. This part of the process does not get much attention in photos, but it decides whether the siding can drain and breathe properly over time.
Inspect And Repair The Sheathing
Before you even touch a plank, walk the walls and study the sheathing. Look for rot, soft spots, mold, and any signs of water damage. Press with your hand and, if needed, a screwdriver. If a section gives easily, cut it out and patch with new material. Siding with fiber cement over damaged wood just hides the problem, it does not fix it.
Install Or Repair House Wrap
A continuous weather barrier behind the siding helps shed wind driven rain and allows vapor to escape from inside the wall. When I am siding with fiber cement, I wrap the house from bottom to top, overlapping each layer by several inches. I tape seams, wrap around window and door openings, and seal any cuts. This step turns the wall into a smart system that drains water down and out instead of trapping it behind the siding.
Add Flashing Where Water Loves To Sneak In
Any joint, corner, or change in material is a chance for water to enter. Flashing is your backup plan when you are siding with fiber cement. Use metal or approved flexible flashing above windows and doors, at horizontal trim boards, where roofs meet walls, and at other transitions. The main idea is simple: always lap upper pieces over lower ones, so water flows like shingles on a roof, from top to bottom.
Trim And Layout: Setting The Lines Before The First Board
Once the wall is dry, wrapped, and flashed, I turn to trim and layout. This is when siding with fiber cement starts to feel real, because you can see the future shape of the wall.
Install Corner Boards And Window Trim
Most fiber cement jobs use trim at outside and inside corners, around windows and doors, and sometimes between levels or materials. Trim can be fiber cement, PVC, engineered wood, or real wood, as long as it is approved for exterior use. Set corner boards straight and true using a level, and fasten them solidly into framing, not just into sheathing. When you are siding with fiber cement, these trim pieces create the edges that all your planks will tie into, so they need to be straight.
Snap Layout Lines For Starter Strip And Courses
Next, I mark a level line around the base of the wall to show where the bottom of the first plank will land. Because ground and concrete are rarely perfect, I rely on a level and chalk line instead of my eyes. For siding with fiber cement, you usually need a starter strip at the bottom to kick out the first board at the right angle. Once that baseline is right, every course above it looks sharper and sheds water better.
Cutting Fiber Cement: Clean, Safe, And Accurate
Cutting is where many people first realize that siding with fiber cement is not the same as working with soft wood. The boards feel heavier, and the wrong blade can chip or crush the edges.
Use The Right Blade Or Shears
For most straight cuts, I prefer a circular saw with a fiber cement rated blade that has a few large, tough teeth. I cut outside and stand upwind whenever possible to keep dust away from my face. For small notches, around vents, or tight details, I like electric shears or a jigsaw with a special blade. On any siding with fiber cement job, a clean cut makes joints tighter and reduces waste.
Support Boards While Cutting
Keep the plank supported on both sides of the cut so it does not sag or snap. Fiber cement is strong, but it can crack if you let one end hang while cutting. I often use a pair of sawhorses or a cutting table. When you are siding with fiber cement on a tall wall, you want every piece solid and whole when you carry it up a ladder or lift.
Hanging The Planks: Main Siding With Fiber Cement Steps
This is the part most people picture when they think about siding with fiber cement: boards going up the wall, one course at a time. The key moves here are consistent overlap, proper fastening, and smart joint placement.
Install The Starter Strip And First Course
Fasten the starter strip along your layout line at the base of the wall. Then place the first siding plank so it rests correctly on that strip and keeps the right gap above grade or hard surfaces, usually several inches. When siding with fiber cement, this gap is not about looks; it keeps water splash and soil from rotting what is behind the siding.
Choose Blind Nailing Or Face Nailing
Most lap style fiber cement can be blind nailed at the top edge, which hides the fasteners under the next course. On windy or tall walls, face nailing may be recommended. Use hot dipped galvanized or stainless steel nails, and drive them into studs whenever you can. Overdriving nails is one of the most common mistakes in siding with fiber cement. Nails should sit snug and flush, not sunk deep into the board.
Maintain Even Overlap And Straight Courses
Manufacturers give a minimum overlap, often around 1 and 1/4 inches, but it can vary. I stay consistent over the whole wall so the shadow lines match and water runs correctly. I like to use story poles or pre marked gauges to keep the exposure the same. When siding with fiber cement on visible facades, a small wave in the courses will stand out forever, so I check with a level or laser as I go up.
Stagger Vertical Joints
Where two planks meet end to end, I always land them over a stud and use a small slip of flashing behind the joint. Then I stagger vertical joints on different courses so you do not see one long line running up the wall. Siding with fiber cement looks more like traditional wood cladding when the joints are random yet planned, not all in one column.
Work Around Windows, Doors, And Corners
Cut planks carefully to butt against trim with proper gaps, usually small but enough to allow for caulk and movement. At outside corners, the siding should tuck behind the corner trim or meet cleanly against it, depending on your detail choice. This is where being slow and steady while siding with fiber cement really pays off, because sloppy cuts around openings stand out as soon as the sun hits the wall.
Panels And Shingles: Other Styles Of Siding With Fiber Cement
Not every project uses lap planks. Some homes use large fiber cement panels or shingle style boards. The main ideas of moisture control and fastening stay the same, but the layout feels a little different.
Large Panels
With big panels, layout lines and joint placement at the design stage are crucial. You may need metal trim or battens to hide or highlight panel joints. When siding with fiber cement panels, make sure you follow the specific manufacturer’s instructions for clips, fasteners, and joint treatments, since these systems can change from one brand to the next.
Shingle Or Shake Style Boards
Fiber cement shingles often come in panels that mimic several shingles at once. They still need starter strips, overlaps, and careful staggering. When I use this style for siding with fiber cement, I pay extra attention to nail placement so fasteners stay hidden in the design and do not split the shingles.
Sealing, Caulking, And Painting: Protecting Your Work
Once all the boards and panels are up, the job is not quite done. The sealing phase is where siding with fiber cement gains its final layer of weather defense and visual polish.
Caulk Key Joints, But Let Walls Breathe
I run a quality exterior sealant at joints where siding meets trim, at inside corners, and around penetrations like pipes and vents. I do not seal horizontal laps, drainage gaps, or weep areas, because those spaces let water escape. When siding with fiber cement, the goal is to block wind and driven rain while still allowing any trapped moisture to find a safe path out.
Prime Bare Cuts And Touch Up
Every time you cut fiber cement, you expose a raw edge that needs sealing. Many planks are pre primed, but cut ends still need primer before paint. On a careful siding with fiber cement job, I keep a small brush and matching primer on hand and treat each cut edge the same day it is made.
Apply Quality Exterior Paint Or Use Factory Finish
Some fiber cement comes with a factory baked on color. Others are primed and ready for site paint. Either way, I follow the paint maker’s spread rate, drying time, and number of coats. Good paint not only makes siding with fiber cement look sharp, it also helps protect the material and the joints from long term weathering.
Final Inspection: Check Your Siding With Fiber Cement Before Calling It Done
When all the boards are up and the last coat of paint dries, I like to walk the whole house with a critical eye. This is your chance to catch small misses before they grow into real problems.
Look For Gaps, Overdriven Nails, And Missing Flashing
Stand back and sight along the courses for any dips or rises. Walk close and check that nails are flush, that joints are tight and flashed, and that clearances at the bottom of the siding match what the manufacturer asks for. Strong siding with fiber cement work looks neat both from the yard and from a few inches away.
Spray Test High Risk Areas
If you want extra peace of mind, you can use a garden hose on light spray and gently wet areas around windows, doors, and roof to wall transitions. Do not blast water upward, but mimic rain. Check inside for any leaks. When you are siding with fiber cement and with good flashing, you should see nothing inside.
Common Mistakes To Avoid When Siding With Fiber Cement
I have seen the same few errors cause most early failures. If you remember these, you are already ahead of many rushed jobs.
- Letting siding sit directly on decks, concrete, or soil, instead of holding a safe gap.
- Overdriving nails so they crush the board surface or break the skin of the plank.
- Skipping house wrap or flashing, assuming the siding can do all the water work alone.
- Failing to prime cut edges, then watching them absorb moisture over time.
- Ignoring manufacturer clearances at roofs, trim, and intersecting materials.
When you treat siding with fiber cement as part of a larger waterproofing system and not a magic shield by itself, you avoid most of these problems automatically.
Maintenance Tips After Installation
After the last ladder is down, most of the hard work with siding with fiber cement is over. Still, a little care keeps it looking good and performing well for a long time.
Simple Cleaning
A gentle wash every year or two with a garden hose and a soft brush is usually enough. Avoid harsh pressure washing directly up under laps, which can drive water behind boards. Dirt, pollen, and cobwebs come off easily, and your siding with fiber cement looks closer to new again.
Paint And Caulk Checks
Every few years, walk around and look for peeling paint, hairline cracks in caulk, or movement at joints. Touch up or re caulk where needed, especially around openings. This small habit stretches the life of both the finish and the material below. When you are siding with fiber cement, that kind of light upkeep is usually all it takes.
Is Siding With Fiber Cement Right For Your Home
In the end, the choice to go with siding with fiber cement comes down to what you value. If you want a cladding that stands up to weather, fire, and insects, and you are willing to follow a clear set of installation steps, fiber cement is a strong option. It suits many home styles, from simple ranch houses to modern boxes with clean panel lines. For homeowners who care about long term value more than a quick weekend fix, these boards often hit the sweet spot.
If you decide to move forward, keep this simple idea in mind: siding with fiber cement rewards patience and respect for details. Every line you snap, every piece of flashing you overlap, and every nail you set flush now is a small promise to your future self that your siding will still look solid years from today.