
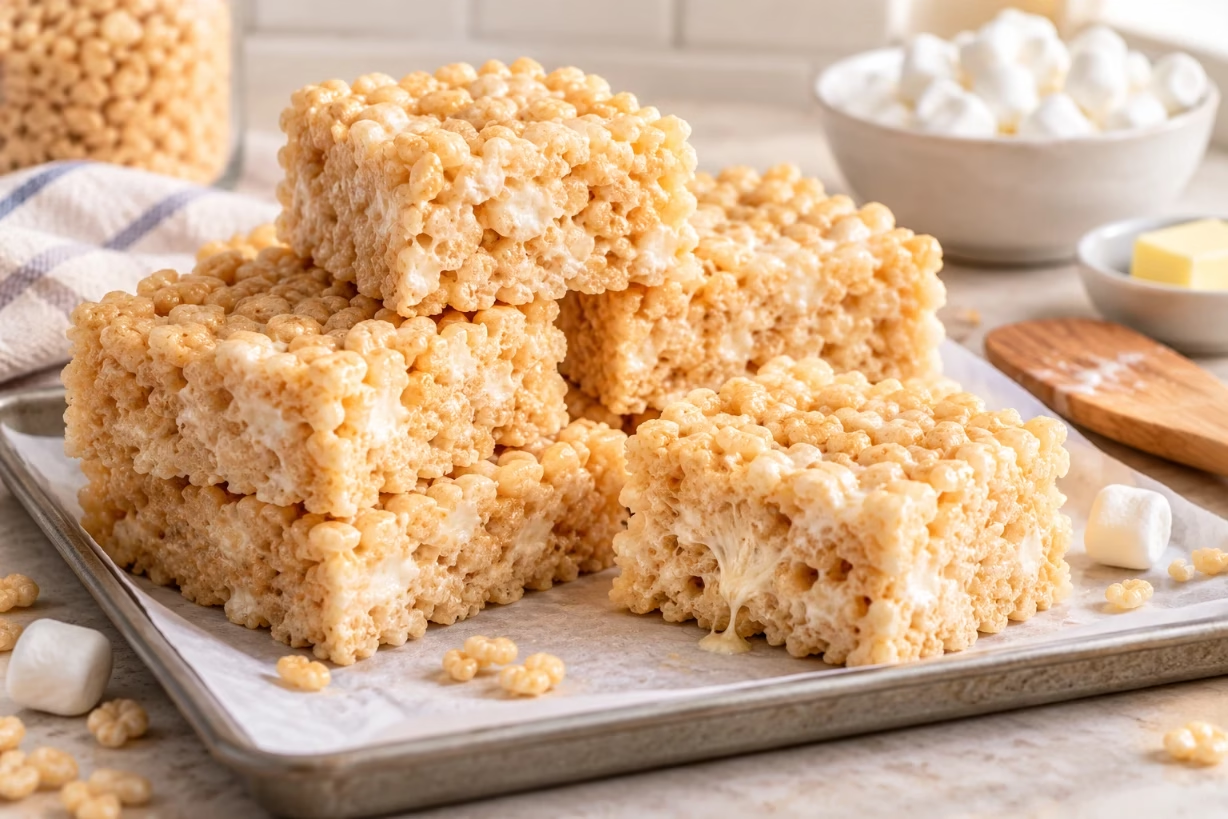
If you want an easy, classic homemade rice krispie treats recipe, all you need is crispy rice cereal, marshmallows, butter, and a pinch of salt, plus a few simple tricks for perfect chewy bars that stay soft, hold their shape, and taste just like childhood.
When I think of comfort desserts from my childhood, this rice krispie treats recipe is one of the first that comes to mind. It is simple, quick, and almost impossible to mess up if you know a few helpful tips. You do not need special skills or tools. You just need a pot, a pan, and a few pantry ingredients. My goal here is to walk you step by step so you can make a classic homemade batch that tastes better than anything from a box or a store bakery.
Why This Rice Krispie Treats Recipe Still Matters
Rice krispie treats have been around for decades, yet they never really leave the spotlight. Kids love them, adults sneak extra squares, and they work for school parties, potlucks, bake sales, and lazy Sunday afternoons. A good rice krispie treats recipe does not try to be fancy. It just gives you soft, chewy, buttery, vanilla-scented bars with that light crackle from the cereal.
I also like that this dessert fits almost any schedule. You can make a full pan in about 15 minutes, and there is no baking time. While the pan cools on the counter, you can finish other dishes, pack lunch boxes, or just relax. Plus, the ingredients are budget friendly and easy to find in any grocery store.
Key Ingredients For Classic Homemade Rice Krispie Treats
Let me walk through the basic grocery list and what each piece actually does in your rice krispie treats recipe. Once you understand the role of each ingredient, you can adjust the texture and sweetness exactly how you like it.
Crispy Rice Cereal
You can use name brand or store brand rice cereal. They both work. The main thing is that the cereal is fresh and still crisp. Stale cereal gives you sad, soft treats that feel flat. You need enough cereal to balance the melted marshmallows so the bars hold their shape and do not turn into sticky blobs.
Marshmallows
Marshmallows do the heavy lifting in any rice krispie treats recipe. They make the mixture sweet and sticky and help everything hold together. Mini marshmallows melt faster and more evenly, which is why I prefer them. If you only have large marshmallows, just cut them in half so they melt more smoothly. Fresh marshmallows are important. Old, dry marshmallows can melt into lumps or stubborn strings.
Butter
Butter adds flavor and keeps the texture soft instead of stiff. I like unsalted butter so I can control the amount of salt. If you only have salted butter, just reduce extra salt a bit. Some people also like to brown the butter first for a nutty, deeper taste. I will explain how to do that later if you want a more grown up rice krispie treats recipe.
Salt
A small pinch of salt makes a big difference. It keeps the cereal bars from tasting one-note sweet. You will not taste it as “salty” when you get it right. You will just notice that the marshmallow and butter flavor seem stronger and richer.
Vanilla Extract
Vanilla gives that warm, bakery-style smell that drifts through the kitchen and pretty much calls people over to the counter. Real vanilla goes a long way, but even basic vanilla flavoring is better than skipping it. This is one of those small touches that makes a homemade rice krispie treats recipe taste special instead of store bought.
Exact Measurements For A Reliable Pan
Here is a basic 9×13 inch pan rice krispie treats recipe that I use as my starting point. You can tweak it after you try it once.
For a standard thick pan:
• 6 cups crispy rice cereal
• 10 ounces mini marshmallows (about 5 heaping cups)
• 4 tablespoons (1/2 stick) unsalted butter
• 1 teaspoon vanilla extract
• 1/4 teaspoon fine salt
This gives you bars that are thick enough to hold without bending, but not so thick that they are hard to bite. If you want extra thick bakery style squares, you can use an 8×8 or 9×9 pan instead and cut bigger pieces.
Step-By-Step: How I Make Classic Homemade Rice Krispie Treats
This is the core method I follow almost every time I use a rice krispie treats recipe, whether I keep it classic or add mix-ins. The main trick is gentle heat and patience with the marshmallows.
1. Prep Your Pan First
Lightly grease a 9×13 inch baking pan with butter or a neutral oil. You can also line it with parchment paper that hangs over the sides. This makes it easier to lift out the whole slab later for clean cutting. I usually do both: a thin butter layer and parchment on top.
2. Melt The Butter On Low Heat
Place a large pot on the stove and add the butter. Turn the heat to low. Let the butter melt gently. Swirl the pan a bit so it does not brown too fast unless you are aiming for browned butter. Rushing this part can lead to burned butter or scorched marshmallow later, and that bitter taste ruins the whole rice krispie treats recipe.
3. Add Marshmallows And Stir Slowly
Once the butter is melted, pour in all the mini marshmallows. Keep the heat on low. Stir slowly and constantly with a heat-safe spatula. At first, it will look like a big puffy cloud. After a few minutes, the marshmallows will start to lose their shape and melt into a smooth pool. You want them fully melted but not bubbling hard.
4. Stir In Vanilla And Salt Off The Heat
When the marshmallows are fully melted and smooth, turn off the heat. Add the vanilla and salt. Stir them in until you do not see streaks of vanilla anymore. Pulling the pot off the heat at this step keeps the sugar from overcooking and turning your treats tough.
5. Fold In The Cereal Gently
Now pour the crispy rice cereal into the pot. I like to add it in two or three batches instead of all at once. Use your spatula to scoop from the bottom and fold over the top so all the cereal gets coated. Move fairly quickly because the mixture starts to set as it cools. This is the point where your rice krispie treats recipe comes to life and the kitchen starts to smell like melted marshmallow heaven.
6. Press Into The Pan Without Crushing
Transfer the sticky cereal mix to your prepared pan. Lightly grease your hands or the back of a spatula, then press the mixture into an even layer. Do not mash it down too hard or you will pack the cereal tight and make the bars dense and hard. I aim for firm but still slightly springy when I press the top.
7. Let The Pan Cool Before Cutting
Let the pan sit at room temperature for 30 to 45 minutes. This short wait gives the bars time to set, so they slice clean and hold their shape. If you are in a hurry, you can chill the pan in the fridge for 15 to 20 minutes, but do not leave them in there for hours or they may turn too hard. Once cool, lift the slab out using the parchment (if you lined it) and cut it into squares or rectangles with a sharp knife.
How To Keep Rice Krispie Treats Soft And Chewy
One reason people search for a rice krispie treats recipe again and again is that the texture can be tricky. Either the bars set up too hard or they fall apart. Here are the simple rules I follow so mine stay soft and chewy.
First, stay patient with the heat. High heat cooks sugar too fast. When marshmallow gets too hot, it stiffens as it cools. Low and slow melting gives you a smooth mix that sets nicely without turning into a brick.
Second, use the right balance of cereal to marshmallow. If you pack in way too much cereal, you will fight to stir and the treats will feel dry. If you add too little, they will be gooey and sag in the pan. The base ratio in this rice krispie treats recipe is a good middle ground. After the first batch, you can add an extra small handful of cereal next time if you want them firmer, or a small handful of marshmallows if you want them stretchier.
Third, do not press too hard in the pan. Think of arranging and smoothing the mixture instead of smashing it. Gentle pressure keeps small air pockets between the cereal pieces so each bite feels light and crisp.
Fun Variations On The Classic Rice Krispie Treats Recipe
Once you master the basic rice krispie treats recipe, you can play around with flavors and mix-ins. Part of the charm is how flexible this simple dessert can be. Here are a few of my personal favorites.
Browned Butter Rice Krispie Treats
For a richer, almost toffee-like taste, let the butter cook a bit longer before you add the marshmallows. Keep the heat at medium-low and swirl the pan. The butter will foam, then you will see golden-brown bits form at the bottom and smell a nutty aroma. As soon as it turns a deep golden color, lower the heat and quickly stir in the marshmallows. Then follow the rest of the rice krispie treats recipe as usual.
Chocolate Drizzle Or Dip
Melt semi-sweet or milk chocolate chips in a microwave-safe bowl in short bursts, stirring often. After you cut the cooled bars, dip one end in the melted chocolate or drizzle it over the top in thin lines. Let the chocolate set on parchment. This twist keeps the classic feel of the rice krispie treats recipe but adds a bit of candy-bar fun.
Peanut Butter Rice Krispie Treats
When the marshmallows are almost fully melted, stir in 1/2 cup of creamy peanut butter until smooth, then mix in the cereal. The peanut butter gives extra protein, a salty edge, and a flavor that pairs well with a drizzle of melted chocolate or a few mini chocolate chips on top.
Birthday Sprinkle Treats
If you want a party version of your rice krispie treats recipe, add a big handful of rainbow sprinkles. Gently fold them into the mixture just before pressing it into the pan, or scatter them on top and press lightly so they stick. The colors make kids instantly excited to grab a square.
Holiday Or Seasonal Mix-Ins
You can easily lean into any season. For fall, mix in a tiny amount of cinnamon and drizzle with white chocolate. For winter, press crushed candy canes on top. For summer parties, add mini chocolate chips and tiny marshmallows on top for a “s’mores” feeling without the graham crackers.
How To Store And Freeze Rice Krispie Treats
There is a good chance your pan will disappear fast. But if you want to plan ahead or save some for later, storing your rice krispie treats recipe the right way keeps them fresh and soft.
At room temperature, store the cut bars in an airtight container with parchment paper between layers so they do not stick together. They stay best for about 2 to 3 days. After that, they are still safe, but the cereal slowly loses its crisp texture.
If your kitchen is very warm or humid, you can keep the container in the fridge for a couple of days, but let the bars come back to room temperature before serving so they do not feel too firm.
Rice krispie treats also freeze well. Wrap individual squares tightly in plastic wrap, then place them in a freezer bag. Push out extra air and seal. They can sit in the freezer for about a month. To thaw, leave them on the counter in the wrapper for 30 to 45 minutes. The cereal will not be quite as crisp as fresh, but the texture is still very satisfying.
Troubleshooting Common Rice Krispie Treat Problems
Even a simple rice krispie treats recipe can go sideways once in a while. Here are quick fixes for the usual issues so you do not feel stuck with a disappointing pan.
Treats Turned Out Too Hard
The most common reason is marshmallow mixture that got too hot or cooked too long. Next time, melt on low heat and pull the pan off as soon as everything is smooth. Also check if you added more cereal than the recipe called for. Too much cereal makes the bars stiff.
Treats Are Too Sticky Or Gooey
If the bars are super sticky and sag when you pick them up, you probably used less cereal than the rice krispie treats recipe needed. Measure more carefully next time, or add a small extra handful of cereal while you are stirring if the mixture seems extremely loose. Letting the pan cool fully also helps the bars firm up.
Bars Fall Apart When Cutting
Sometimes the knife drags and pulls chunks out of the pan. Lightly greasing the knife blade can help. Also, make sure the bars are cool and firm before cutting. If you cut while they are still hot and soft, the squares can break or warp.
Uneven Texture With Dry Pockets
If you find random dry chunks of cereal inside your bars, it usually means the cereal did not get fully coated with marshmallow. Use a big pot so you have space to stir and fold thoroughly. Take a minute to scrape down to the bottom of the pot and bring everything together evenly.
Making Rice Krispie Treats With Kids
I like this kind of rice krispie treats recipe for baking with kids because there is no hot oven, and most of the steps are simple. An adult should always handle the hot pot and the stove part, but kids can measure cereal, open marshmallow bags, and help gently press the mixture into the pan once it cools a bit.
This is also a good learning moment for measuring ingredients and following a recipe in order. You can let them choose mix-ins like sprinkles, chocolate chips, or candy pieces. When kids take part, they feel proud to offer “their” treats at family dinners, birthdays, or school events.
Choosing The Best Rice Krispie Treats Recipe For Your Taste
Even though the base ingredients are simple, rice krispie treats can range from very sweet and gooey to light and crispy. When you search for a rice krispie treats recipe, you might notice some call for more butter, some for extra marshmallows, and some for less cereal. Here is how I think about it.
If you like ultra soft, stretchy treats, choose recipes with more marshmallows than cereal and a bit more butter. If you prefer firmer, less sweet bars that travel well, look for a rice krispie treats recipe with a slightly higher cereal ratio and maybe even a pinch more salt. You can also test half batches in a smaller pan until you find your ideal balance.
Personally, I like something in the middle: soft enough to almost melt when you bite, but firm enough to pack in a lunch box without smashing into a sticky ball. The recipe I shared above lands in that sweet spot for most people who try it.
Serving Ideas For Parties And Special Events
You do not have to keep rice krispie squares plain. Small touches turn a basic rice krispie treats recipe into a fun dessert spread. Cut the slab into tiny bite-size cubes and serve them in mini cupcake liners. Dip one corner of each bar in chocolate and roll in crushed nuts or sprinkles for a dessert table.
For birthdays, use cookie cutters to press shapes out of the slab, like hearts, stars, or numbers. If the slab is thick and still slightly warm, the cutters slide through more easily. You can also place a skewer or paper straw in each shape to make rice krispie “pops.”
For themed parties, swirl colored candy melts on top, or use colored cereal blends. You can keep the core rice krispie treats recipe the same and just change the appearance and toppings to match the occasion.
Why Homemade Rice Krispie Treats Beat Store Bought
There is nothing wrong with grabbing a pre-packaged bar when you are in a rush, but homemade almost always wins in taste and texture. When you use your own rice krispie treats recipe, you control every detail. You can use real butter, adjust sweetness, add vanilla, and choose how thick to cut the bars.
Freshly made treats also have a different mouthfeel. The cereal is crisp, the marshmallow pull is soft and stretchy, and the butter flavor comes through clearly. Store-bought versions often sit on shelves for weeks. By the time you eat them, they can taste a bit flat or overly processed. Once you get comfortable with this simple rice krispie treats recipe, it becomes hard to go back.
Final Thoughts On The Classic Rice Krispie Treats Recipe
A good rice krispie treats recipe gives you more than just sugar and cereal. It gives you a small, quick way to share something sweet with people you care about, without stress or complicated steps. With a pot, a pan, and a few pantry items, you can turn a regular day into one that smells like melted marshmallow and butter and feels just a little more special.
Whether you keep your pan traditional or load it with sprinkles, chocolate, or peanut butter, the heart of this dessert stays the same. Simple ingredients, easy method, and that first satisfying bite when the crispy cereal crunches and the soft marshmallow gives way. Once you have your go-to rice krispie treats recipe dialed in, you will always have a quick dessert answer ready for parties, last-minute guests, or those nights when you just want a sweet taste of childhood again.